i recently purchased a new purse, the Kavu Rope Bag.
 |
| Kavu Rope Bag - Blue Leaf |

fabric for the exterior and lining (i used scraps for everything)
batting for added protection (i used scrap fleece)
two snaps
bias tape
velcro
cell phone

step 1:
cut out a piece of exterior fabric measuring 4"W x 13.5" L. do the same for your batting and lining, but this time cut them a little shorter (abt 1/4") than your exterior fabric. by cutting those shorter it will prevent your inner fabrics from bunching up too much when all layers are folded.
step 2:
now, sew the short ends of all three layers together. since the inner two layers are shorter sew one short end together. then line up the edges on the other end and sew. once both ends are sewn you'll notice how the outer fabric bunches up when you lay it down. don't worry, you want this b/c this means the inner layers will fit perfectly when you fold it.
step 3:
once the short edges are sewn together you're going to sew on your velcro. your velcro can be any size and length you like. for my length i just cut a piece abt 2" long. take the soft side of the velcro and center it on one end of your outer fabric. sew in place. the top of the velcro is about 1" from the edge of the fabric. next, sew the other part of the velcro to the lining of the opposite end. center it and place it abt an 1" from the edge of the fabric.

step 4:
line up both short ends and pull your fabric tight down at the center. place a pin at the center. to help keep the fabrics in the right spot while adding the bias tape i pinned all along the sides. once you're pinned add your bias tape. add to all four sides. i will say, it was a little tricky getting all the fabric inside the tape by just simply sticking the fabric between the bias tape fold. here is a link to a tut i found on Pinterest on how to attach bias tape. this tut, or using extra wide tape, would have made things so much easier and would have prevented me from having to undo portions of the bias tape where the fabric didn't catch and started to come out.


step 5:
now it's time to make and attach the back strap. cut out a piece of 2" x 6" farbic. with right sides together sew along all three edges but leave abt an 1" opening in the middle of the long side. trim corners and turn right side out. sew up the opening. i then presed my fabric to lay the edges flat. next fold your strap in half and mark the center. now you're going to attach the strap to the pouch fabric. to find out where to attach the strap on the back i put my phone inside the pouch and marked on the outside where i would like the strap to be. once you have the placement attach the strap by making a 1" wide rectangle. i then went back and did an 'x' in the middle for added security. then you'll need to add your snaps to the strap. to figure out where to place them i folded the strap aroundthe strap of my purse and marked the two spots on the bottom piece of the strap. then i simply followed the instructions onn the snap attachment tool, and voila! now it's time to finish up your pouch.

step 6:
to create the pouch simply stick the velcro pieces together so you can decide placement for the flap. once things are in place fold up the flap so you can sew the middle section. to do this i sewed just along the inner edge of the bias tape. start above the top edge of the short end to make sure you get the corners. once both sides were sewn i went around the edges of all the bias tape with fray check just to make sure none of my seams came out. once you've made the actual pouch portion you are done!


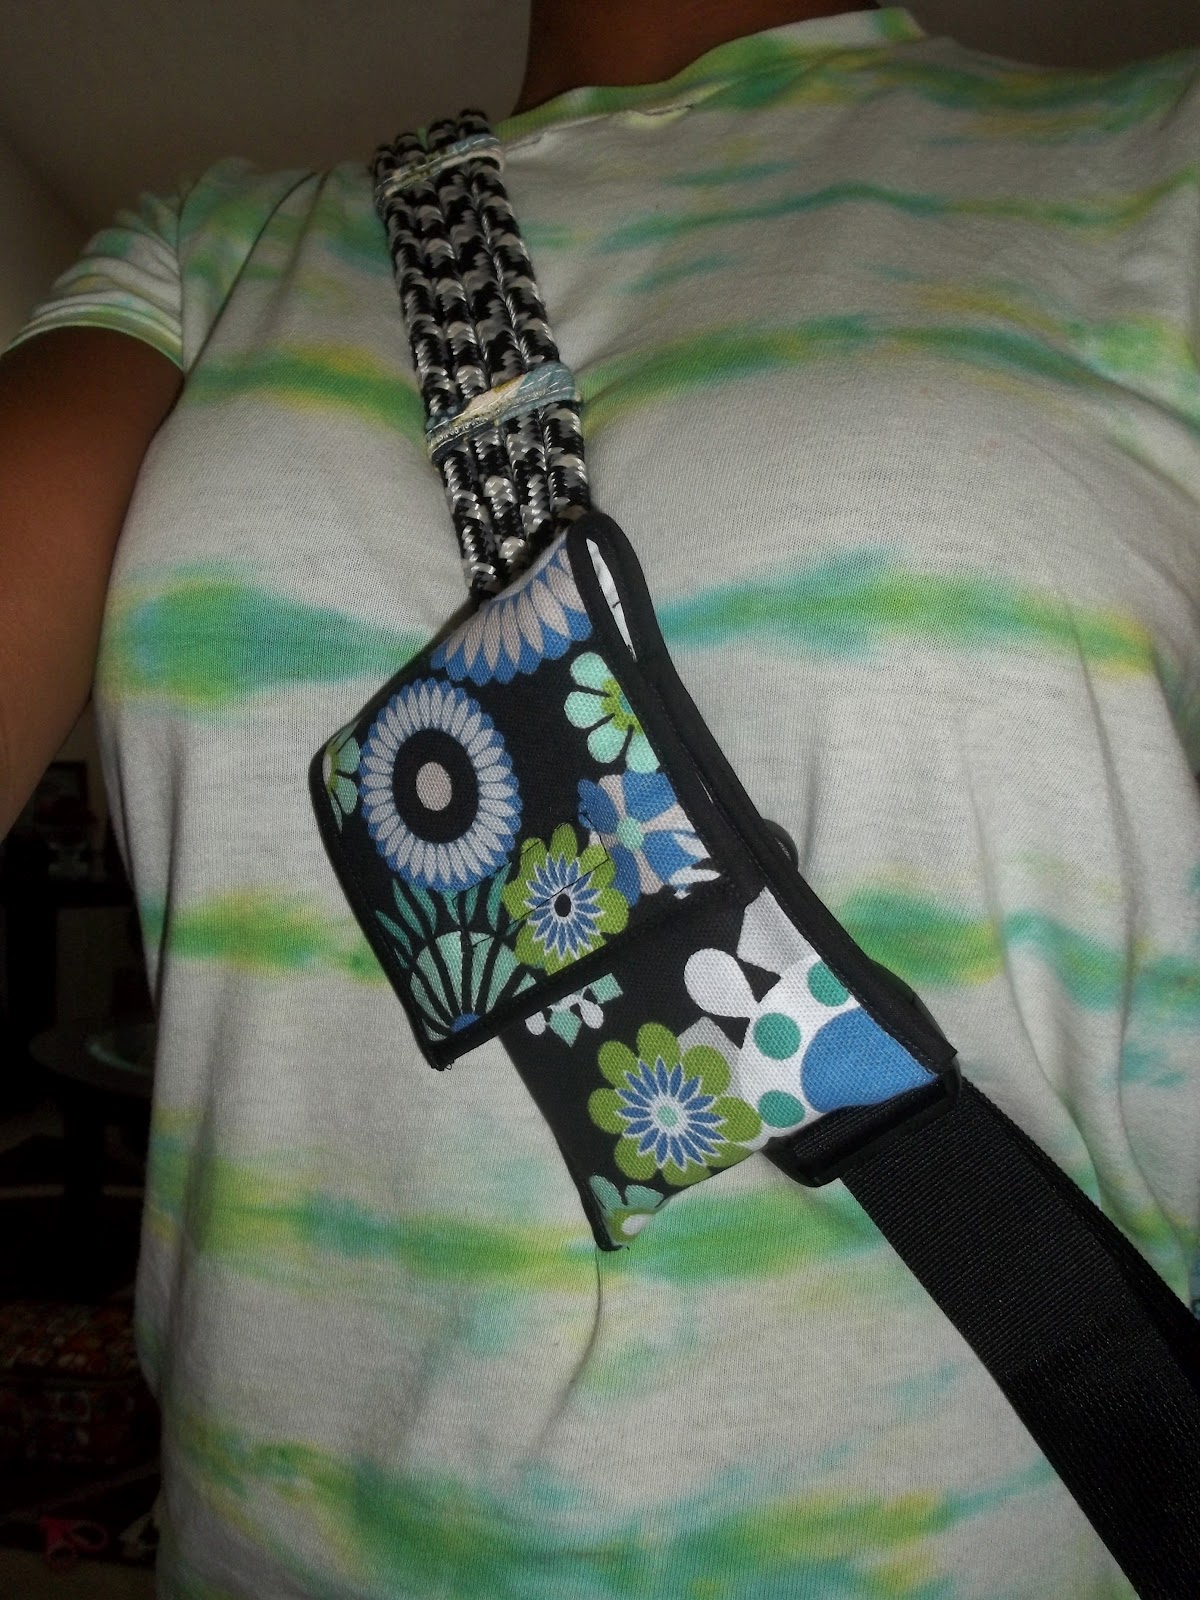
slide your phone in and admire your new cell phone pouch!

here is a pic of the pouch actually attached to the strap of my purse. now i have easy access to my phone and i don't have to worry about my phone being all the way around my back.
Wow! this post it's useful for me, I need to make some like this, thanks for share!
ReplyDelete